티스토리 뷰
안녕하세요. 버닝워커 입니다.
이번에는 WPF기반에서 Windows 컨트롤을 가져오는 방법을 소개 합니다.
Windows 응용프로그램에서의 xaml 활용보다는 손쉽게 구현이 가능해 보이네요 =_=b
일단 WPF 응용프로그램 프로젝트를 하나 만듭니다.
역시 이번에도 참조를 추가합니다. 추가할 참조는 System.Windows.Forms, WindowsFormsIntegration 두개를 추가 합니다.
xaml 코드에서 네임스페이스를 추가 합니다.
xmlns:wfi="clr-namespace:System.Windows.Forms.Integration;assembly=WindowsFormsIntegration"
xmlns:wf="clr-namespace:System.Windows.Forms;assembly=System.Windows.Forms"
결국 Window 테그는 다음과 같습니다.
<Window x:Class="WpfApplicationTest.Window1"
xmlns="http://schemas.microsoft.com/winfx/2006/xaml/presentation"
xmlns:x="http://schemas.microsoft.com/winfx/2006/xaml"
xmlns:wfi="clr-namespace:System.Windows.Forms.Integration;assembly=WindowsFormsIntegration"
xmlns:wf="clr-namespace:System.Windows.Forms;assembly=System.Windows.Forms"
Title="Window1" Height="300" Width="500">
그리고 추가한 네임스페이스를 사용하여 폼에 DataGridView를 넣어봅시다.
<wfi:WindowsFormsHost Height="200" Width="400">
<wf:DataGridView x:Name="WinDGV">
</wf:DataGridView>
</wfi:WindowsFormsHost>
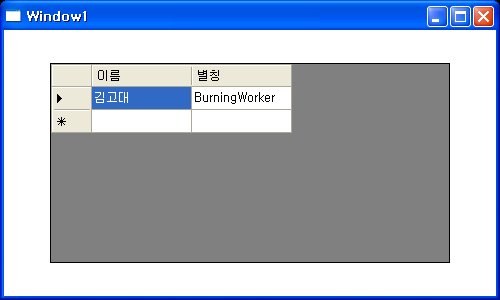
이렇게 추가를 하고나면 폼에 WindowsFormsHost 컨트롤이 표시되는 것을 확인 할 수 있습니다.
이제 CS코드로 가서 DataGridView에 데이터를 넣어봅시다.
방식은 기존의 Windows 응용프로그램에서와 동일합니다.
public void BindWinDGV()
{
DataTable dt = new DataTable();
dt.Columns.Add("이름", typeof(string));
dt.Columns.Add("별칭", typeof(string));
dt.Rows.Add("김고대", "BurningWorker");
WinDGV.DataSource = dt;
}
위의 매소드를 생성자에서 부르면 이제 바인딩된 DataGridView를 확인 할 수 있습니다.